Showing posts with label Miss Kate Cuttables. Show all posts

Monday, October 7, 2013

Spooky tag

Is it really time already for Halloween crafting?  I guess it is.  I kind of missed September completely this year, what with fixing up the house and two straight weeks of constant vet visits with Sophie when she caught some sort of nasty stomach bug.

To kick off the Halloween season, I started with a tag.  I found a super cute Halloween 6x6 paper pad by DCWV at Joanns a few weeks ago and used it for this tag.  If you can't see, each diamond has a little skull and crossbones in it.  I cut the tag from a file from the Silhouette store- I think it was one that came with my Cameo, if I'm not mistaken.  Then I tied three pieces of Trendy Twin on the top and wrapped another piece around the tag three times.

I cut this poison bottle on my Cameo from Miss Kate Cuttables.  There were three bottles in the cutting set, plus a few words, but on tags I like to go super simple and to the point so I just picked the one that also had a skull and crossbones on it.  Can you see how crazy intricate my Cameo cut it out?  There's a little tiny nose on the skull!  I popped the bottle up on some foam squares over the twine, and really liked it like that. 


I'm entering this tag into the following challenges:
Trendy Twine- Spooky tags and twine
 2 Creative Chicks- Spooktacular Linky Party    
2 Creative Chicks- Halloween
Cameo Creations- A Haunting we will go
Pin It

Wednesday, August 14, 2013

Lightening Bugs

Good Wednesday morning, friends!  Today I've got a summery card to share.  When I was little, I always loved to catch fireflies with our little butterfly nets, so when I saw the Bug Catcher file at Miss Kate's Cuttables, I knew I had to get it.  I put the file on my Cameo mat and decided that I wanted the jar to be a bit wider, so I just resized it to where I wanted it.  That's one of the things I love about the Cameo!  I put a line of silver Stickles on the lid of the jar and I put diamond Stickles on all of the fireflies' rumps to make them sparkle.  Two of the fireflies are on foam dots, and the rest are adhered down flat.

The background paper is from a MME 6x6 pad (of course, because I have a jillion of them!) I cut the yellow circle out of  a piece of Recollections patterned paper and then stamped the sentiment from Jaded Blossom's Simple Sayings.  I kind of thought it looked like a full moon, plus it brings in the yellow from the fireflies.

The washi tape along the botton is from Target.  Sometimes I don't like washi tape that is clear, so I put it on plain old computer paper and then cut it out and adhere the whole thing down.


This card is being entered into the following challenges:
Cut it Up Challenges- What’s Bugging You?
 All That Stickles- Anything Goes
Pin It

Friday, June 28, 2013

Birthday piggy

Howdy friends!  I hope you're all having a great Friday and are going to have fabulous weekends!  Today I have a fun little piggy to share.  He's one of the past freebies from Miss Kate Cuttables (don't worry, you can snag him for only $.50 if you missed him as a freebie), but the birthday hat I cut myself.  I have about a million birthday hat svgs and cricut cuts, but the bad thing about being in this little bitty craft room is that everything gets stashed away and then I don't want to get it all back out again, just for a triangle.  So, since I had already put my Cameo away to make room on my table for the actual crafting, scissors it was.  :)  I figured he was a birthday pig because I'm a firm believer that you can do whatever you want on your birthday, and I imagine splashing in the mud is just what a pig would like.

I got the background label svg from Bird's Cards- it was a freebie too!  Then I layered it on top of some MME paper and added three buttons in the top corner and a sentiment from Pink by Design in the bottom corner (btw, I love the Pink by Design "Artisan Tags 2" set that this is from because it's perfect for those times when  you want to add a sentiment but your cut ended up taking up more space on the card than you had planned.)

I added some Firefly stickles around the green part of the tag because I thought my pig needed some sparkle.  I like to put stickles on colors that are similar but slightly different to see what happens- this paper is actually a sea green, and I think it turned out looking nice with the brighter green of Firefly.  It muted the Firefly stickles a little bit but livened up the pastel-ness of the sea green.


This card is being entered into the following challenges:
Die Cuttin' Divas- Birthday with Three Embellishments
Craftin' Desert Divas- On the Farm
Simon Says Stamp Challenge- Anything Goes
All That Stickles- Firefly

Pin It

Wednesday, June 12, 2013

The ice cream man is coming!

Remember that feeling of being outside playing with your friends and hearing that tinkling music and realizing that he was on his way?  I sure do. 

When I saw this ice cream truck svg at Miss Kate Cuttables, I knew I had to have it.  It's so cute and so summery!  I cut all of the pieces with my Cameo and it was really easy to assemble just by looking at the picture.  I used a cream card base for this card, with some dark pink paper from Recollections and then a piece of cream and pink paper from Echo Park.  In real life, the cream paper and the white of the ice cream truck contrast really well, but I'm definitely not a photography person and I can't seem to get a picture to represent that.  I used some grey washi tape as the road and then put some orange gems up in the top corners.  I decided to go with some Cotton Candy stickles on the ice cream cone.


I'm entering this card in the following challenges:
Cameo Creations- Summertime
 Paper Playtime- Anything Goes
Pin It

Sunday, May 5, 2013

Chickadee

Sometimes it's nice to have a card just to say hi to someone.  That's the point of this card.  I cut the two little chicks in the nest from Miss Kate's Cuttables.  One tip that I learned: I knew that I wanted the chicks' cheeks to be about one shade darker than their faces, but I didn't want to spend a ton of time searching for just the right paper- so I cut the cheeks and the face from the same color, and then just used my versamarker on the cheeks to make them a shade darker.  I did the same thing on the nest and the twigs on top of the nest.

The card itself is A2.  I am still adjusting to sizing of SVGs on my Cameo, so my chicks ended up a little smaller than I originally thought.  So to make use of my space, I cut the dark blue card base, then cut three pieces of patterned paper in increasingly small mats.  The light blue and yellow are from Recollections and the polkadot paper is from My Mind's Eye.  I wrapped some dark blue ribbon around the top layer and taped it on the back.

I added a dark blue button with a twine bow in one corner and stamped a sentiment from Pink by Design's Bracketful set in the other corner. 


This card is being entered into the following challenges:
Pin It

Monday, April 15, 2013

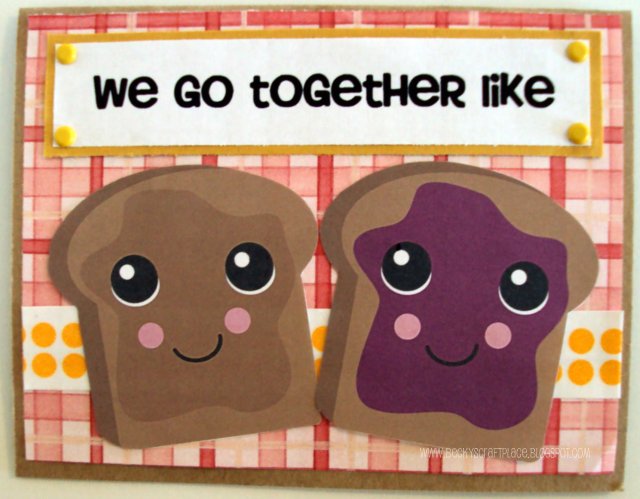
PB&J

Good news!   Today starts another challenge at Pause, Dream, Enjoy Challenges!  Our theme for this challenge is Friendship.   Make any project that has to do with friendship!

Today's card is a little different for me!  I've been frequenting some SVG websites because as much as I love my Cricuts, I'm saving up for a Silhouette Cameo and I like the freebies that they often have.  I was so excited when I saw this PB&J freebie from Miss Kate Cuttables back in January.  Because I don't quite have my Cameo yet, I printed the images out and hand cut around them.  I love the idea of the best friends as peanut butter and jelly!

I also used a printed sentiment.  I cut around it, matted it on yellow paper, and put yellow mini brads in each corner.  I used some washi tape mounted on white paper as an embellishment behind the friends.


Now it's your turn!  Create a project about friendship and link it up to play with us at Pause, Dream, Enjoy Challenges!  I can't wait to see what you create!
Pin It